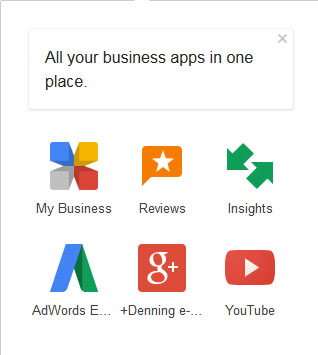
With the recent changes at Google and the launch of Google My Business as the new management tool for business owners, it is time for a comprehensive, step-by-step guide to making the most of this update.
This guide assumes that you have previously claimed and verified your business listing with Google at some point. If not, that is your first step.
- Log into Google My Business: http://mybusiness.google.com
- All business listings associated with your login will display on the next screen.
- Note that you may find that you have more than one listing. This has happened over the years as Google transitioned from one product to the next. You’ll want to clean this up by deleting the duplicate listings. But, do that last (step #14 below).
- You will see a check mark next to any listing that has been previously verified. It is the verified listing that you want to focus on. Click “Manage this page” to open that listing.
- If your listing is incomplete, you will see a progress bar showing what percentage remains to be done. Keep working until you are at 100%.

- Often adding a profile image is one of the open items. Keep in mind when choosing an image that it will be cropped into a small circle. So, you’ll want a square image, and your logo or some piece of your logo is the best choice in this spot.
- Google makes adding your profile cover image a little trickier because it isn’t done in this area. You have to go to your Google+ page to do that. In order to get there, simply choose the “Google+” icon from the group of 6 icons in the upper right. Once there, if you hover over the cover image area, a black “Change cover” button will appear. Click that button and follow the onscreen instructions for uploading your picture. To return to Google My Business, simply click the link in the #1 step above.

- Click the red “Edit” button in the upper right to review all information in the listing to ensure accuracy. To make changes, click the pencil icon out to the right.
- Pay particular attention to the Category section of the Edit screen. You are allowed to choose multiple categories, but are restricted to those offered by Google. Choose all that apply to your business and its products or services, making sure to make the primary business as the “Primary” category.
- Upload pictures in the Maps & Search photos area of the Edit screen. These can be pictures of your location, your principals, your products, etc.
- Write a well-crafted and descriptive summary of your business for the Introduction section of the Edit screen. Be sure to include words that describe your competitive market and industry, but do not stuff it with keywords.
- Be sure to hit “Submit” at the bottom of the Edit screen to save your work.
- To return to the main “Manage this page” screen, you can simply click the “My Business” button in the upper left just under the Google logo.
- From there, use the Google+ section to share recent news. This can be a piece of news that is on your site. You would introduce the news item and paste in a link to the full information on your site. Whenever you add new content to your site, be sure to come here and share it via the Google+ Share area.
- Check and respond to your reviews. The easiest way to manage your reviews is to choose “Reviews” from the grouping of 6 icons in the upper right. Learn more here about why it is important to reply to your Google reviews.

- We recommend that the management of this page, including checking and responding to reviews and posting regular updates via Google+ be assigned to someone in your office. You can add and delete managers for your page from the Settings area, which is found to the right of the red Edit button and looks like a gear. Choose “Settings” from the drop down menu offered by clicking on the gear icon. From there, choose “Managers” from the horizontal menu of choices across the top. Simply click the blue “Add managers” button to open the “Invite new managers” window. Type in their email address and click the “Invite” button. Note that any new managers will need to have a Google account in order to manage the page.
- Lastly, delete any non-verified duplicate listings. Go to “Manage this page” > go to the Settings dropdown (to the right of the red Edit button) > Choose Settings from the dropdown > go to the very bottom of the page and choose “Delete page.” Do not do this unless you are sure that it is a duplicate of a separate, verified listing.
If you’d prefer some assistance, we are happy to help you with this process.

