Getting started with Instagram Reels
Are you ready to increase your Instagram reach by posting reels? In our previous post, we discussed the changes happening on Instagram and stressed the importance of small businesses embracing video content to stay competitive on the app. But for those of us who aren’t social media managers or zoomers, the learning curve can be a bit steep. Have no fears–we are here to help!
Today, as a start to a series of posts on Instagram reels, we’ll teach you the basics of how to post a reel. We’ll cover what to post on reels in a future post so stay tuned for that. Watch our own Instagram feed for each new post in this new series.
What is a Reel?
Reels are Instagram’s answer to TikTok. It’s basically the TikTok formula, but on Instagram. In other words, short videos in 9:16 portrait mode. Reels often utilize popular music or audios, and it is a heavily trend-based format–you’ll often see people taking a popular video and recreating it with their own spin!
The best way to understand reels is by browsing and watching them. When you are in the Instagram app, click the bottom middle button, and scroll through to see what it’s all about!
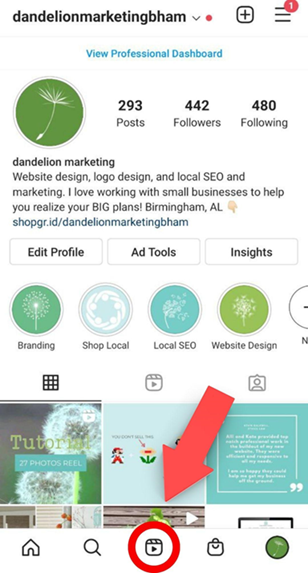
How to Create a Reel
After you’ve resurfaced from your deep-dive into reels (adorable dog videos, anyone?!), it’s now to get into the nitty gritty of making that happen for your own small business account. We are including screenshots with every step to guide you along the way.
Begin the Reel Post
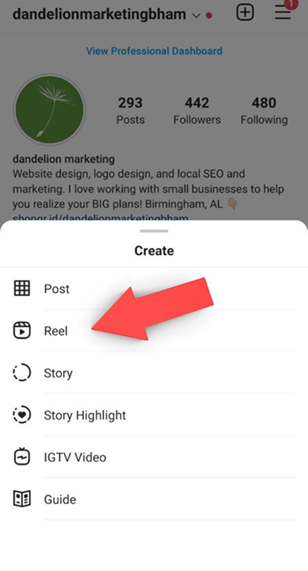
To post a reel click the “plus” button–just like you are posting a regular photo. Depending on where you are in the app when you tap the button, you’ll see one of these screens. In either one, simply click the word “Reel.”
Upload Video Content
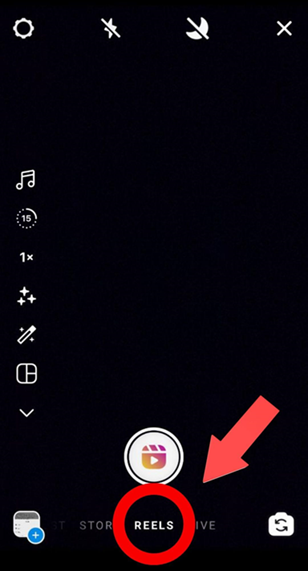
Now, time to upload some video content! You can record your video straight from the app by clicking that big record button! Or you can upload your video from your gallery by selecting the gallery button on the bottom left of the screen! Personally, we like to fully create or edit our videos in a separate app and upload them from our gallery–it’s way easier that way.
Here’s a short tutorial gif on how to upload and trim a video from your gallery!
Repeat this process to upload multiple video clips!
Accessing Audio
Maybe you want to use trending music or sounds from Instagram, here are a couple of ways you can access audios!
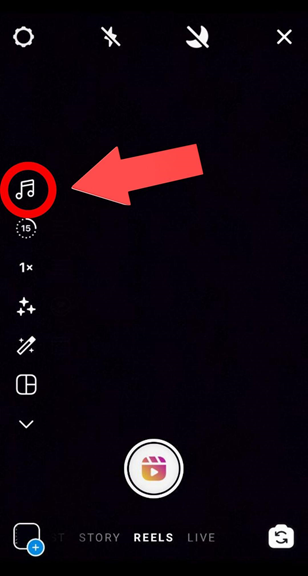
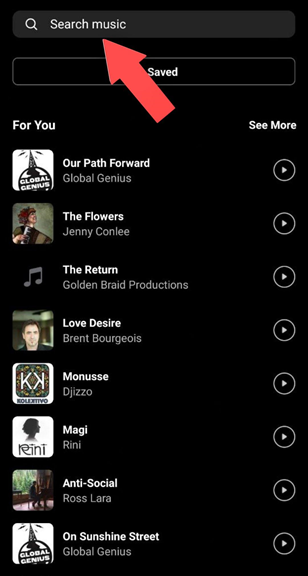
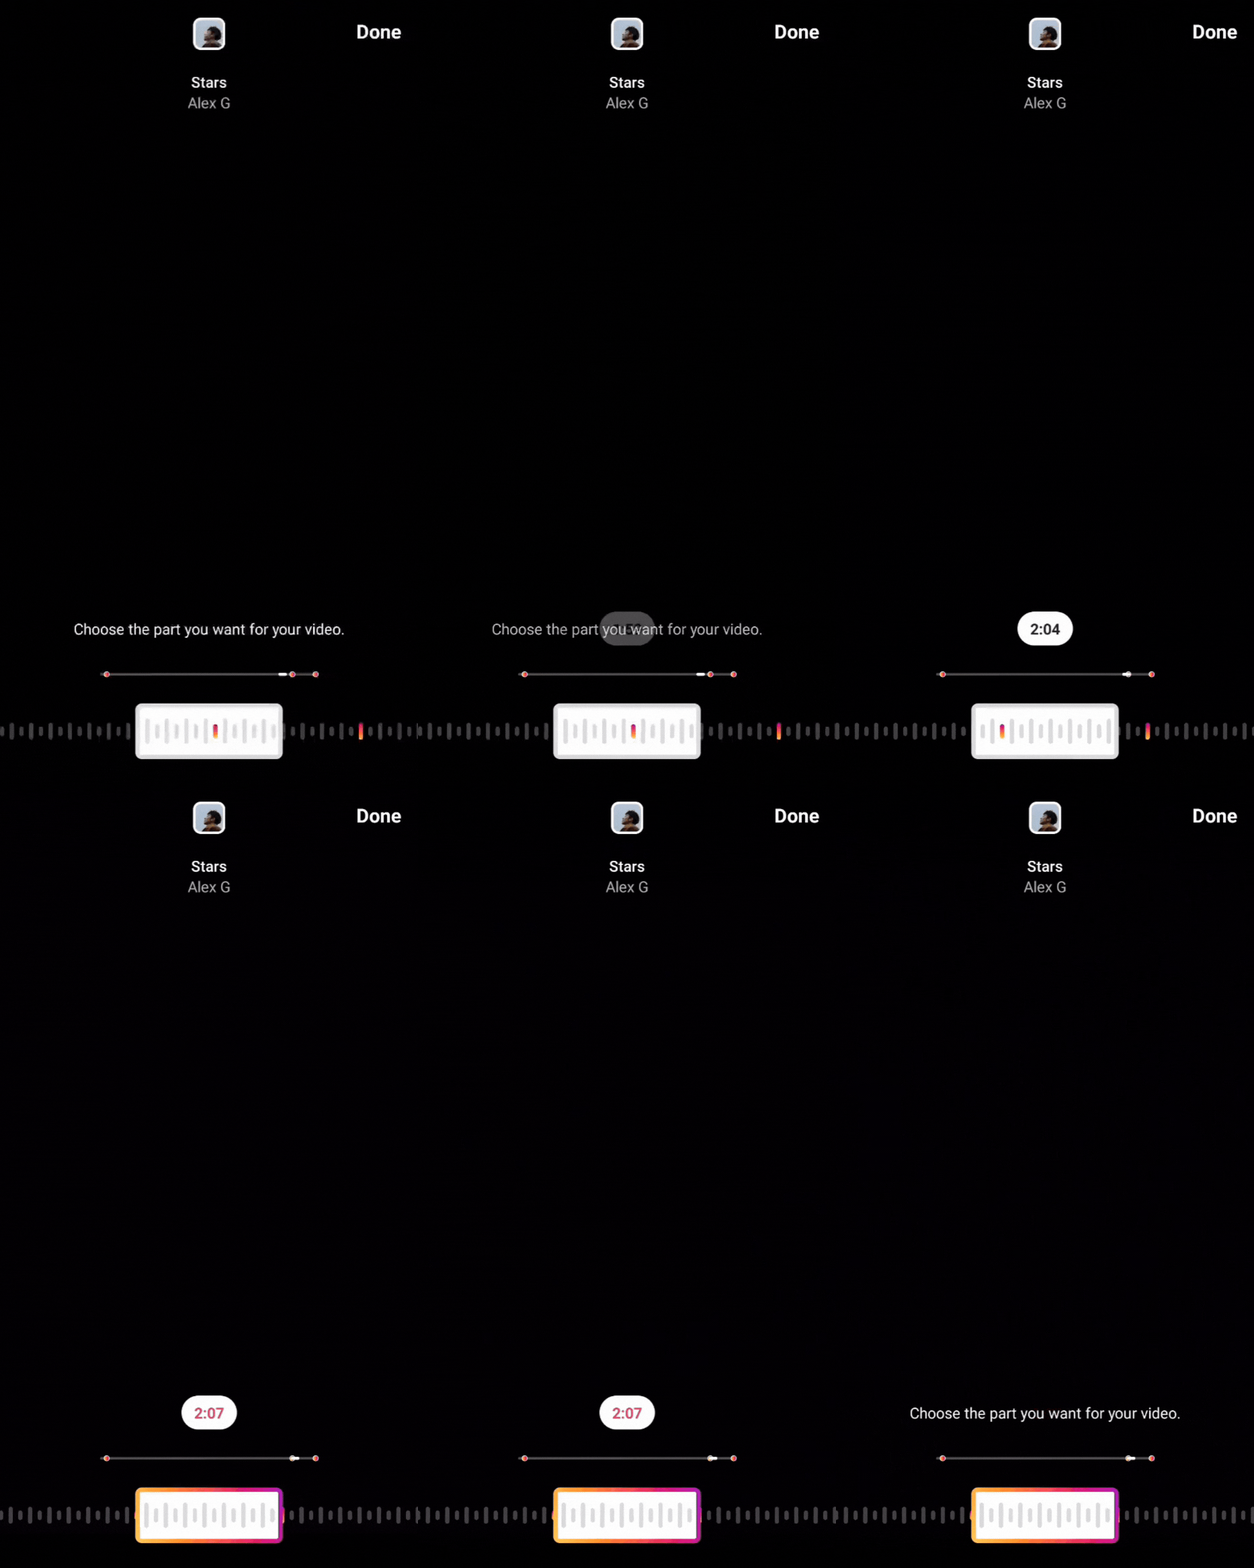
- Click the music icon and search for the song you want to use! Select your audio and find the part of the song you want to use in your reel with the slider shown in the gif below.
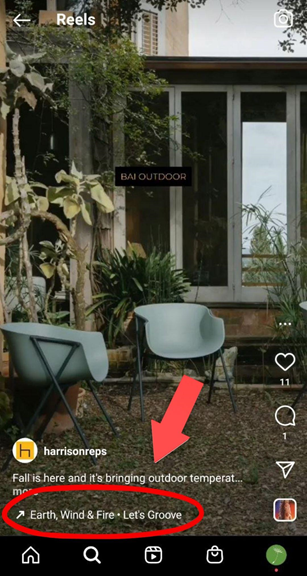
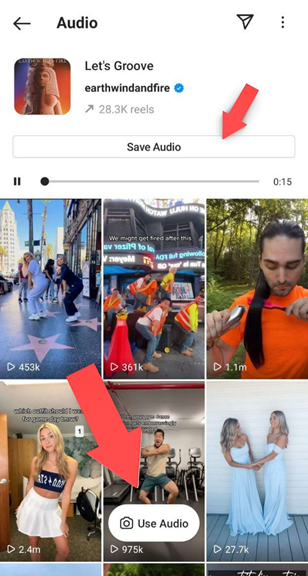
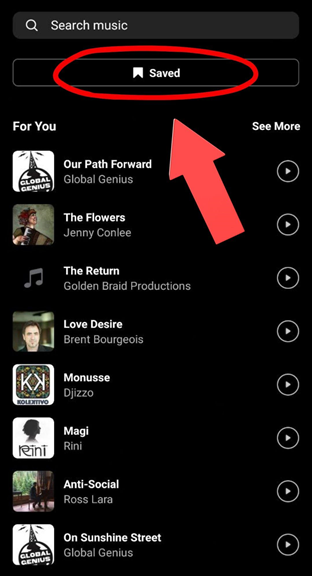
- To use a song or audio from someone else’s reel, click on the name of the audio (right underneath the caption). You can then select “Use audio” to use it in a reel immediately or tap “Save audio” to save it for later use. Saved audios show up in the same spot that you would search audio–just click “Saved” to access your saved audios.
You can also simply use the audio that is already present in your video.
Posting Your Reel
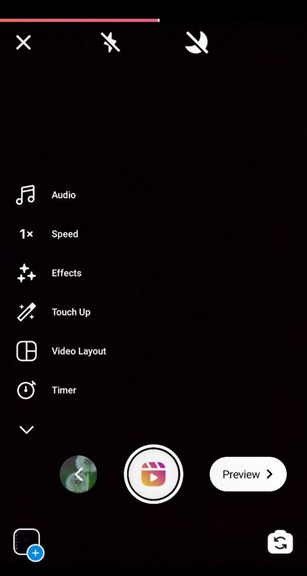
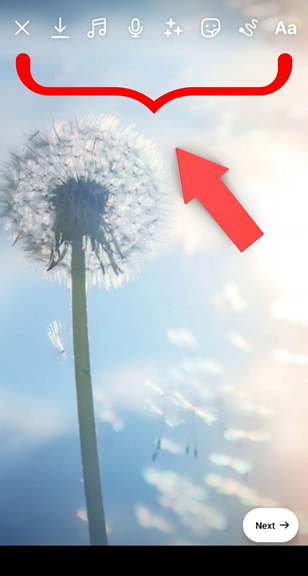
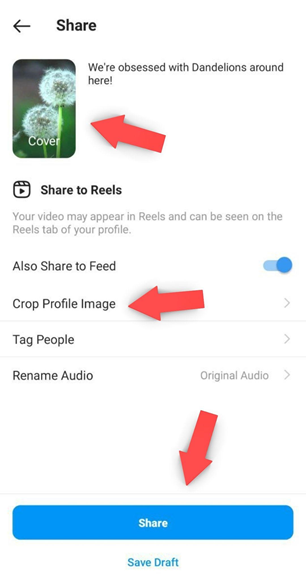
Once you have your audio and video in place, click Preview to check out your creation! You’ll have the option to add text, effects, or other elements to your work by tapping the icons at the top of the screen. We can’t cover all of the options here, but feel free to play around with these! Once you’re done, tap “Next” and you’ll be taken to a screen to finalize all the details! You can add a caption, choose the cover for your video, and crop the cover to determine how it will look in your profile grid!
When you’re all done, click share! Congrats: you’ve posted a reel!
Now that you have an understanding of the basics, it’s time to put your creativity to work! There are tons of other reel features you can use to create something totally unique! We encourage you to spend some time getting to know the interface and scrolling through your reels tab to see what others are creating. In no time, you’ll find a trend that has a logical application to your business.
Stay tuned for our next post in this Instagram Reels series with some reel inspiration for your business!

